Thursday, April 1, 2021

My ReMus preamp. Pandemic project number 3,84whatever

 Today was pandemic project number three thousand two hundred and whatever. It entailed me spending a whopping 2 hours re-vamping the ReMus preamp I built way back in 1998 when I lived on the corner of Missouri and Failing (yes it actually was a dead end!) in Portland Oregon. 


It was an early build of mine with the classic "bowl o' spaghetti" construction. But it worked shockingly well so I never bothered to fix a few annoying issues. 


First was eliminating the tape out buffer. This preamp has one too many gain stages. The beauty of it is it's simplicity (I'll provide an updated schematic here).  So I put this part of the circuit on a switch as I like to use it for putting vinyl to digital. But audio should not pass through it going to the output. It's redundant and likely causes phase issues. There was something about the original design that I simply didn't like but couldn't put my finger on. I figured less is more and this did the trick. The whole thing sounds dramatically better.


Second was back in the day I used 1Meg pots. The original calls for 250K. I couldn't even turn it up past one before it gets too loud for my room using the phono stage! I fell into a rabbit hole trying to decide what to throw in there. This is my hi fi.... guitar amp pots aren't gonna do. One can obsess over this stuff. I wound up using pots by Tokyo Cosmos cause, well, Cosmos. I like the name!! I got them through Antique Audio Supply:  https://www.tubesandmore.com/products/potentiometer-tocos-rv24-audio-10-6mm-shaft


Again, major improvement. Everything sounds better and is much more in control!


My preamp is kinda "dual mono" rather than "stereo". In other words I have two mono volume pots for left and right rather than a dual pot. This eliminates the possibility of having one side behave differently than the other. 


I also replaced the output caps with Sprague Paper in Oil. Not Vitamin Q but I'm sure very similar. They're 1uf@ 400V.  Before I had these beautiful Angela polypropylene caps that were 1.5uf. I love those but wanted to try something else and love the Spragues more. The rest of the caps are Angela / Jensen PIO caps. Sadly none of these are made any longer. I think the business has gotten so spread out with competition. I don't know that anyone is making better stuff than what he was offering in the 90's.


Last but not least..... I used some cheapass RCA jacks. Total Jive dig?!? 


What was I thinking? They were always getting loose! The phono, line and output stage I did years ago with nice Switchcraft 3501. So today I finally did the rest, 24 years later! Typical tech. The last thing you want to do after a long day is your own stuff so it's easy to tolerate. One of my favorite luthiers plays bass. I asked him how his basses play and knew the likely answer: "dude they all play like crap!" he replied laughing.


Much better! I also added a center channel output should I want to experiment with a sub woofer. I've been fantasizing about that. Building a 50 watt mono block only to be used for symphonic music, reggae, soul, Afrobeat, electronic stuff. I'm kind of afraid I'll like it too much and get addicted to it but hey....

I also finally color coded my wires, left and right channel..... It was difficult to get Mogami hookup wire back then. Finally have a source and they have plenty of pretty colors! Cheap as chips too. That stuff is great. Warm, rich, full bodied wire and easy to work with. I could only buy it in blue back then!! 

Buy it here: 


Apparently you can get this on Amazon now but, well, ew......

So now I have one final task. The power supply is separate. It uses a 5U4 tube with all oil filtering, two chokes (another choke inside the preamp housing for a total of three!) and 6.3V DC filament voltage. I built it this way so I can have it far away from the audio. No AC voltage enters the preamp except for the signal itself. But...... I used an old Kenton transformer I scored at a Ham Fest.  And it buzzes.... I once had a 1967 Plexi 100 Watt Marshall with the same annoying problem. I couldn't do anything about that one cause no one made a replacement part for that old beast and, well, it was vintage. I think I sold that one to Mick Mars. He bought a few from me back then. Nice fella!

Anyway, that transformer has gotta go. It's ironic to have gone to such great lengths to create something quiet only to live with a stupid mechanical buzz! That will be my mid-April project.


For those who are interested in the schematic, here is the modern "no tape buffer' circuit. Brilliantly simple.


My own version used octal preamp tubes, substitute 6SL7 for 12AX7 and 6SN7 for 12AU7. I prefer these for hi fi. The modern little 12 volters sound a bit hyper for my taste. I like a bit more euphonic presentation. Plus I can still find high quality octal preamp tubes for much cheaper than tubes all the guitar freaks need! And they tend to last forever.

So there you have it. In it's 24 year life it burned out two resistors (the 22k cathode follower resistors on the output tubes.) I upped those to 5 watt wire wound resistors, nice Allen Bradley ones. Yes, I like to overbuild things. I don't want to open this up until 2031 now. I've changed tubes a few times just for fun. I think this set has been going since I moved to Brooklyn in 2011. Still making music!

I also didn't use their power supply schematic. I just went with a simple 3 stage dual choke loaded power supply like they've been using since the 1920's. Why so many chokes? Why big oil caps? I used to live by a surplus shop, actually two: R5D3 on 82nd Ave and Cascade Electronics way up in the northernmost tip of Portland and they had so much of this junk! These oil caps will last forever and they look super hip. Plus, again, relaxed sound...  I avoid electrolytics when I can, and sometimes you really can't, I find they just don't work as well. Besides, if you are only going to build one thing, why not go all out into the land of the ridiculous??? Just please, don't do what I did and skimp on cheap RCA jacks that get loose when you look at them wrong, or right, or whatever....

J


Monday, March 29, 2021

1964 Fender Deluxe Reverb. Re-capped but still too much hum. What can I do?

 Here's the desert island amp for many of us and I think after all these years I'm one to be on that island myself. A really clean 1964 Fender Deluxe Reverb. 


About the amp: Transformers are original, speaker was replaced with a Celestion G12M greenback 30 watt. I'm a fan.... Amp was re-capped well enough. All of the electrolytic caps were top shelf expensive Sprague Atoms. Some of the work wasn't exactly tidy but done well enough.

But, I just didn't like the amount of hum I was still getting. I right away saw some things to improve. First is the bias supply cap:


Whoever re-capped this amp went with the original value. I mean, why wouldn't you. That's what Fender used in 1964 so.... 

Nah. When I worked for Jeff Bober in 1994 he just told me to upgrade it to 100@100v rather than 25@50v. I've been doing it ever since. Better regulation and less hum. I do not detect any change to the sound of the amp and I have well trained ears. And for what it's worth Fender upped it later to 70uf then 100uf cause they could. Caps got a little better. So just do it. If you think that's blasphemy try it anyway and put the old value back in if it freaks you out.

Yup, being dramatic here but I'll share a story. I once had a client who paid me to convert an AB165 Bassman to an AA864. That's no small task. Big job. I made one mistake and one executive decision. He took the amp home and inspected the work under a microscope. The next day I had an irate customer who brought his amp back and he (understandably) expressed his trust had been burnt. So I gladly changed the one pot value that I missed to the correct one. But he was really upset about my little executive choice: using a 100@100v for the bias supply. I explained to him why I did this: with a 25@50v cap it will hum. He didn't believe me one bit and I could tell I was losing his business.

So we gave it a listen, I then replaced it with a 25uf cap.... HUM! And not a teeny tiny difference. It was significant enough that he heard it and looked a bit embarrassed. He asked me if it would make a tonal difference and I said no but if he thinks it does bring it back in a week. I put my little 100uf cap back in, fired it up and he was happy with the quiet. I never saw him again. All is well that ends well!

So here ya go. Use a pretty blue Philips Vishay cap if you will! I like them cause they look nice and European:


But wait! We're not done yet. Amp was much improved but I still wasn't 100% satisfied. This next part involves the signal caps.

If you have been inside as many old Fender and other high quality amps you'll notice even the signal caps have a direction. No they're technically not polarized like an electrolytic cap is, but there is a direction you want them to go in. The have an inside foil and an outside foil. Some old caps like my favorite Ajax blue capacitors you find in Fender amps even tell you which side is the outside foil.

Rule of thumb: always have the outside foil closer to ground. In other words, if one side of the cap is on the 100k plate load resistor and the other is connected to the 1Meg volume pot, outside foil goes on the 100k resistor. Fender almost always got that right! I've only seen a few exceptions. 

Another example is the tone stack. The .1 bass cap goes to a 250k pot and the .047 mid cap goes to a 6.8k resistor. On the other side is the 100k slope resistor then the 100k plate load resistor for a total of 200k. So the bass cap should have the outside foil attached to that slope resistor and the mid cap should be going the opposite direction with the outside foil connected to the 6.8k resistor on the bass cap. Like this:


The phase inverter has three .1 caps. Two are connected to the plates of the 12AT7 while the third is connected to the grid. On the plate load side you have a 100k and an 82k resistor going to each plate. On the other side you have two 220k resistors going to the bias supply. So the outside foil goes to the plates, inside to those 220k resistors. The third cap however is connected to a 1meg resistor on one side and a 47 ohm resistor going right to ground on the other side. So that cap goes in the opposite direction. In this case the previous owner used my least favorite cap, the Sprague 715P. No indication for inside or outside foil so you just read it from left to right. It will look like this:


Notice how the print is going in the opposite direction.........

Here's the dry channel tone stack. I had a spare old polyester orange drop cap that has a stripe on it for outside foil. The mid cap you'll notice reads left to right with the left going to the 6.8k resistor. If you are experienced you'll notice the .047 600v blue Ajax cap for the final stage. Sadly entire channel was orange dropped. But I have a bag of .047 Fender "Death Caps" from the AC balance. I never throw these out when I ground an amp. I save them for classy amps like this one!


One cap backwards will not make all that much of a difference but in this case I counted 5. It adds up. In the hundreds of old Gibson and Fender guitars I've seen over the years, the tone caps are almost always done in this arrangement: outside foil to ground. If the good people at those companies were sticklers for such a detail on the treble bleed cap, there's something to it.


So there you have it. The amp behaves like my own '69 model now. Quiet! Of course it's not possible to eliminate all hum and noise but it is possible to reduce it using these little steps. And the less noise the more music dig?!


Thanks for reading, hope this was helpful and feel free to leave a comment of ask a question below! J


Wednesday, December 30, 2020

1979 Fender Vibrolux Reverb with tremolo issues. Should I charge more for silver panel amps???

 Here was a mess.......


Fender 2x10" Vibrolux Reverb circa 1979. When it came across my bench it had your typical noise issues and one nasty "bumpity bump" from the tremolo circuit. 

Once I opened it up the first thing I noticed was someone had done a rather half assed job at a black panel conversion (AA964 circuit.) So I figured I may as well complete the job. I changed all the elecrolytic caps first which helped but there was still that tremolo issue. Curiously enough it  was far worse when you turn the reverb up! So I started by eliminating that boost circuit, which takes away a length of wire that is about 8" long traveling from the reverb transformer output to a switch on the back of the volume pot. That made a little bit of difference, less wire generally equals less issues. But that didn't knock out the problem. 

Sometimes this problem is as simple as changing the tremolo tube or the "bug" network (the photo cell neon bulb thing) or just putting a .1 cap across the bug from the 10M resistor to ground. This was already standard factory goodness by then and the amp had that, though they used a .01. I upped it to a .1.....

Next I noticed the 2.7k cathode resistor and the 820 ohm resistor were opposite of where they were on a black panel amp. The 2k7 resistor should be on the left closer to the tremolo tube and the 820 ohm resistor should be on the right closer to the reverb recovery / mixer tube. That made a sizable difference. And it came that way from the factory. I next changed the cathode cap on the 100k resistor on the tremolo tube to a 4.7uf. That helped too.....

But, I like things to be close to perfect. When you turn up the reverb it still did the bump like my parents did in 1978 at the disco in Germany. Cool for the dance floor though they were told to "get a room" by an English fellow.

So what to do next? 

The silver panel amps can be cantankerous. They're just not that well made. The foundation is there: great transformers, hand wired, this one retained the 5u4 tube rectifier, but they just used things like cheaper wire. I've had noisy silver amps that I literally needed to change the wire to get the noise level down.

In this case it became clear to me they just used too much wire! Lead dress is important. 

I mean, look at this jive:


An experienced tech can see the problem. The wires on the tremolo tube are way too long and crossing the wires on the reverb recovery tube! This is factory wiring folks from the CBS days. So I proceeded to shorten the wires and move them away from one another....


That knocked out the problem. I wound up shortening the leads throughout the amp. Overall, it lost about a foot + of wire!

I cannot imagine this isn't a problem that developed with time. The wiring was all factory and the amp has been played hard for the last 40 years. I'm stunned to see that no one attempted to correct this issue before, or maybe the previous owners never used the tremolo circuit. That's plausible. Tremolo isn't for everybody.

So now this amp is ready for proper use. It's got a great sound and I feel good about it going to a new home. When I had my own shop I'd roll my eyes whenever a 70's Fender came in. Most were okay, straightforward, but many were challengers. 

So hopefully this post will help another tech out. Do look at the lead dress. There was a good amount of haste in those days at Fender. I mean look at a 1979 Stratocaster. My first guitar was one and it was terrible. Seriously a sad, heavy, careless piece of corporate lack. This amp is better than that guitar, they were just five dollars away from making both well but chose to cut corners. Fortunately this amp is now terrific cause amps are easier to transform! My poor old guitar will never be good. I didn't feel bad giving that one away years ago!


JB


1963 Fender Bandmaster, tremolo issue. And, how to slow that tremolo down

 Today was fun. 3 silver panel Fenders and a blonde. All of them were a hot mess of craptastic tech work! Poor soldering, poor choice of components, general laziness.


The best was this 1963 Bandmaster......


These are one of my all time favorites. They're genuinely weird amps in the Fender canon. With active tone controls that people largely rejected and that lush absolutely glorious 3 tube harmonic vibrato that was likely quite expensive to produce. It sounds closer to a Univibe than what any other Fender produces. It's got a phase shifter quality. Not like the pitch bending Magnatone, it's just a shade subtler. 

These amps used to be cheap as chips. Not any more, yet they aren't all that popular. People prefer the tweed and black series, these are just, odd. I bought one for $300 in 1991 and played it with a JTM45 together during the Grunge Scare of the early 90's. Big tone!

So this one was a mess. Just general poor tech work on the inside. It was re-capped years ago. I re-did the electrolytics. The whole thing was Orange Dropped. Not my favorite but since I was on a budget I let them be. Besides, most of them were the old polyester series which I like very much. Only a few were the 715 series.

The choke and output transformers are replacements, the choke being from 1966 and the output transformer is from 1972. Not the least bit unusual on this model. I've seen more Bandmasters throughout the whole range that had bad output transformers and a handful with bad chokes. I think they were just a hair under rated, but that's part of what gives a Bandmaster it's special sound. These parts were likely replaced years ago as this amp has been around the country making music. It's had a life and a half!

So once I got the basics done I noticed the obnoxious "thump thump thump thump thump" of the vibrato system hadn't gotten any better. Simple fix. One of the cathode bypass caps in the circuit was supposed to be a 2uf cap. Someone upped that to a 10uf cap. The tremolo circuit in any amp can be very sensitive so it's best to go with the original component values. Problem was solved right away.

Sometime it's a bad tube that causes this, or a bad cap or resistor. Today I was lucky. No time tied up in trouble shooting mode.

But..... while I love the tone quality of the vibrato in these amps I wasn't satisfied. It was just to fast. Not enough range. Rather boring. Simple mod took care of that.

Locate the 3 caps in series that create the oscillation. On the plate its .02, the other two are .01. I simply doubled the 3rd cap by placing another .01 cap in parallel to the one connected to ground. First try it out:


You can try different cap values here and if you like it cut those leads and give it a permanent home:


Not a bad idea to do it this way rather than replace the original component so if down the road you want to remove it there ya go!

Anyhow, this one is making music again and is for sale at Southside Guitars here in Brooklyn. It's a fantastic amp. Player grade yes, but you're a player right?

JB


Thursday, December 10, 2020

Hum reduction in a 1965 Fender Vibrochamp, fix that filament line!


This article is about a nice player grade 1965 "Fender Electric Instrument Company" Vibrochamp that came across the bench. However, this applies to many other amps out there.

This amp came to me in reasonably good condition. Speaker was replaced with an 8 ohm (I installed an early 70's 3.2 ohm Jensen) and the output transformer is long gone and was replaced with a classy Mercury Magnetics Tone Clone. It had been re-capped reasonably well and this included the signal caps. I like pristine amps but I kinda like ones like this a bit more. I don't feel bad about making improvements in such an amp, and I know it will not sit in a museum after it leaves, it will be used in a living room or someones studio as it was meant to be. These amps are no longer cheap so I do my best to make them as functional as possible.

So the trouble was even after a re-cap it still had a good deal of hum. That's actually not all that unusual on one of these and it's challenging to get the hum out of a class A single ended amp to begin with. The trouble with these lies in the filament line. To cut cost on this little student amp Fender grounded one end of the filament line along with one side of the filament in each tube. This creates a wide and kind of stupid path and eliminates the hum reducing effects of having a twisted filament line as you see in anything from the Princeton on up to the Twin.

This is a pretty easy thing to fix. An experienced tech can knock it out in about a half hour.


So first thing locate the green wire that is going to ground near the filter caps. That is one side of the 6.3VAC filament line. Un-solder it or simply cut it. It's soldered to the same point as the center tap on the high voltage line (red with yellow stripe):


Next unsolder the tab on your pilot light that is connected to the housing which is ground:


Take the green wire that you disconnected from ground and solder it to the tab you have liberated from the pilot light:


Now add the wire you will be using for the other side of the filament. I use high quality cloth heavy gauge wire for this. It's nice to work with and it looks classy. Some day someone will open this amp up and I'd rather have it look good when they do!  Here's a link to the good stuff....


Added wire:


Next disconnect the ground wires attached to pin 7 on the 6V6 and pin 9 on both 12AX7 tubes:


Remove them:


Now add the green wire and carefully twist it like you see in bigger amps. You want it to float above the tube sockets and drop down over them. 


Now for the all important ground reference! The original Fender power transformer has a center tapped filament. Woo hoo! You'll likely see an extra wire that is green / yellow just taped off with electrical tape. You will need to extend it likely. Do that, add heat shrink tubing for safety and simply solder it to ground:


Now this is one method of creating ground reference. It's actually not my preferred method. I like using a 100 ohm pot across the filaments with the center tap either going to ground or to pin 8 (cathode) in the output tube. You can really dial it in this way. But if that's not an option you can also just use 2x 100 ohm resistors across the filament to ground or to the cathode. The advantage is safety. If your 6V6 plate shorts to the filament and your fuse doesn't pop, you'll burn up those 2 resistors rather than burn up your 6.3v heater winding, thus destroying the power transformer. Better to burn up a couple bucks over a transformer that cost a C note or better and making your hip amp even more "player grade" than it is.

As an example here's what it looks like, 100 ohm resistors going from pin 2 and 7 to pin 8:


This is an arrangement you see in a lot of old hi-fi amplifiers. My own hi fi amps have this arrangement as well.

Now, will this eliminate the hum? In my experience, no. But it will greatly reduce the hum. Can the hum be eliminated? It likely can by converting the 6.3VAC to DC with a bridge rectifier and voltage regulation. But why bother. It's a guitar amp that was never meant to be perfect. 

Now I have done this mod (described in this article, not DC conversion!) in push pull amps. One is the very well built and classy Guild 66J. Nearly silent. The other of note is the not well built and trashy Silvertone 1484. A customer pushed me and pushed me years ago and lo and behold, this made him happy. Quietest Silvertone on the planets. And if you are going to buy a Guild 66J (very under-rated!) buy this one:


It's one I had the pleasure of working on. Brand new expensive filter can and quiet filament line.....


One other thing of note. I did replace the cathode bias resistor as it was burnt up real good..... I like to use a 5 watter myself. These old Champs run very hot. You can experiment with the value on this resistor. Try going up to 750 ohms or better. This may, and I haven't tried this myself, reduce some hum as well. The 6V6 cooks in a typical Champ. The later 70's ones in my experience can really burn through tubes. If this is a problem for you that is worth having a look. 

If you notice I always separate the cathode bias resistor from the capacitor. This is to reduce heat getting on that cap. With the standard 2-3 watt resistor people like to use it gets very hot. I've seen it melt that cap literally. Again with some 70's amps the little white cap is almost always melted! I also always go with a 50V or better cap in this position. Just from experience, if it's a hot Champ a 25V cap may blow up, literally! And if you do experiment with a higher value resistor please note the voltage will rise on that cap.


Once you are done remember always use a Variac or a current limiter to test your amp. Remove the 5Y3 rectifier and make sure your filament line is good before adding the high voltage. Tubes should light up as well as the #47 pilot light. 

And I cannot stress enough, safety first. Always double check your work as you go along. I just had a 70's Princeton with so many errors in it, big errors. Go slow and if you don't feel comfortable doing this kind of thing, pay someone with a good reputation to take care of you! Your amp wasn't cheap and it's worth it!

J


Wednesday, October 14, 2020

My personal 1969 Deluxe Reverb


This is my personal Deluxe Reverb. I just bought it from Division Street Guitars in Peekskill NY. Great shop, give them lots of business!

I added the blue jewel on the light bulb. Blue on silver is just right for me.

This post is just about general routine stuff. Amp had the rectifier tube removed and replace with a couple of 1N4007 diodes. Gross...... Well, at least not for me. 


Fortunately the power transformer is intact, easy fix. Clip thise sad diodes out and put the yellow wires back to pins 2 and 8:


Next was just the filter caps. Sad, old and leaking. I didn't keep the sleeves this time cause, well, who cares? It's a silver panel amp! You can see they are leaking badly. Please don't leave stuff like this intact for the sake of "collectibility." Remove and replace.


I like to put two 80uf@450v caps in series with two 220k 2 watt bleeder resistors in the first filtering stage. Keeps me from getting zapped! And if you have an amp that has 500+ volts sitting there before you hit standby, this is safer. 80+80 in series is 40uf....... Perfect for a tube rectifier where you do not want to go over 50uf.


Next is the 470 ohm grid resistors. One was replaced but I just did both. You can also see those .001 capacitors from pin 5 to ground. Gone. Never needed them! The AB763 circuit is just better.


So I'm not the biggest fan of those "Brick drop" capacitors. A bit harsh. I replaced them with a mix of Sozo blue capacitors (lovely!!!) and some old Ajax caps and Sprague Black Beauty caps. 


In the phase inverter I went with a .002 cap feeding it from the preamp. The silver panel amps use .01 which I don't like much and the black panel amps use .001. I like it somewhere in between. You can freely experiment with values there and see what you like. 

This is my first amp with reverb since 1992! New sounds for me. Absolutely beautiful voice. I used all American and European NOS glass. So hopefully the public will get to hear this some day when Covid has passed. And it shall pass like everything else. Let's keep it real and get through these times together. God I miss live music!


Of course, these old Fender amps have a way of getting away from me. So as long as I don't sell it.....

I should add, the late 60's Fender amps with the removable baffles like this one are some of my favorites. They're consistently great sounding. I'm not a fan of the tweaks they did but those are minor and it's a piece of cake to put them back to the black panel glory. The transformers are pretty much the same, this uses a 5AR4 rectifier rather than the 5U4. That's important. The amps made soon after this are very good still, right up until the 1980's. They're all hand wired. But these late 60's amps, you have more fun options. If I wanted to I'd replace the baffle with Baltic Birch. Mojotone makes those ready to install. I've done this for clients and for a couple amps I owned that had cracked baffles. The later ones the baffle is glued in. Bah! Why???!!! 

So do consider one of these if you have fancy champagne taste on, well, a good wine budget. No they ain't beer sadly, but still priced more reasonably than the vaunted black panel amps..... 

Sunday, October 11, 2020

My 5E3 Deluxe "UN"-clone, simple mod for tight bass, more clarity. (As featured on 'The Truth about Vintage Amps with Skip Simmons"


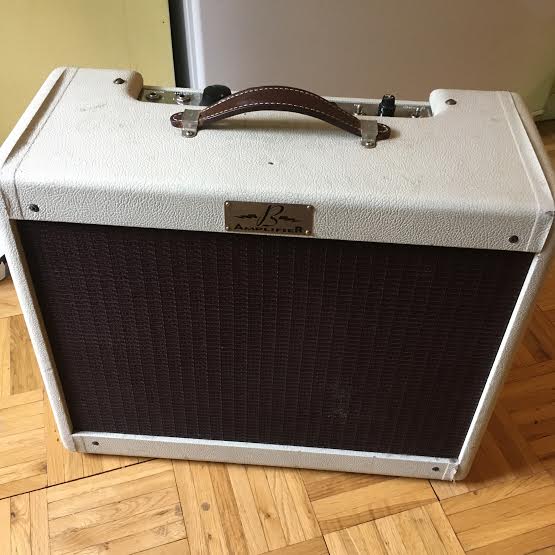
Recently I was interviewed about an amp I built, one that is my main gig amp. Steve Melkisethian of Angela Instruments played it about a decade ago and it left quite an impression apparently. He commented on the low end and how it held together nicely. Isn't your typical "Neil Young dirt box!"

Truth is it's all in the big knobs folks:


So, obviously that's not true. But there isn't much to it. First, a bit of background. I have no qualms with the stock 5E3. I'm a big fan of Neil Young and his sound and I've always liked the 5E3. I just wanted to build something a tad bit more modern for my own use. I prefer a tighter sound, something that is more clear. Most of my gigs I'm not using a mic. I've had little tube amps literally get swallowed up into the mix. I can't actually use that. I need to hear myself to have a good time. 


The first thing I did was what I usually do: 47uf capacitor on the first stage, followed by a 22uf then an 8uf. That 47uf makes a difference in sag and compression. The original is 16uf. I also like that first stage to clean up any unwanted 60 cycle hum right off the bat. 


The second thing I did was use a larger cathode bypass capacitor across the 250 ohm 10 watt resistor. You can experiment with values there, I used 100uf @100V. The Vox AC30 uses a 250uf cap there. Deep bass.

Photos of power supply and cathode bias arrangement.


Now these things helped me achieve my goal. But that's not all. The next thing I will freely admit I did not come up with on my own. I mean, same with what I discussed above, these are all things I just learned from others.......

I had a really good client when I owned Leighton Audio in Portland Oregon. He was a bit of a perfectionist. My eyes would roll whenever he came by cause I knew I'd work a little harder. But every time I worked with the guy I learned something new, so I always appreciated not only his business but also his "can we make it better?" attitude.

He brought in a 5e3 clone that he bought somewhere. Nothing special. It had a problem, bad tube or something. So when I got to it I noticed this 3.3Meg resistor that "shouldn't be there." I said in my mind "well, that's wrong" and yanked it on outta there.

He picked up his amp, got home and said "problem is fixed, but this amp had such a great low end and now it's flabby. I knew exactly what was going on, it was that mysterious resistor. So he brought it back in, I replaced it and we were both happy. Him to have his amp the way he liked it and me cause I learned what I wanted to do to my own amps.

So, what exactly is this mod? I can't say I know why it works, I can just say what the result is.

Take a 3.3Meg resistor from the last stage of the power supply and connect it to the grid of the phase inverter, the pin attached to the 1 Meg resistor. That's it. Voltage goes up on that grid and the cathode, amp sounds more clear, has tighter bass and if you like that hooray. If you don't simply remove it.

Photo:


I was asked if I would put it on a switch..... Switches aren't for me personally. I have enough on my mind when I'm on a gig. Volume, tone, guitar. That's as much bandwidth I need on my equipment so I can focus on the music. But if you prefer a switch, go for it and tell me your results.

Other bits about the amp... I used Mogami wire throughout the signal path. I learned this from working with an ace studio technician named Tim Hatfield back in 1992. It's nice to work with and sounds warm and clear. It's finally widely available again. I could find their shielded stuff from many sources but had to go through some channels to get this copper gold back in the day! I've used it for mic pre's, pedals....


I also used nice Black Cat capacitors in the preamp along with Sozo caps as well. Good old mica cap for the treble....


Transformers are Heyboer / Mojotone Deluxe Reverb power transformer (lower voltage, more current, runs cooler!) and just a Mercury ToneClone for the output. I didn't want to go with bigger iron. For me it's a balance between high quality components and average. Black Cat caps aren't the best in other words, but they're then best for this kind of thing in my opinion.


And hey, this mod works on Princeton amps too! I like a Princeton, I've never loved them. They sound harsh and unbalanced to my ears when you push them. Not useful to me. I prefer my Deluxe Reverb for a 'modern' Fender amp.

Recently I had 2 Princeton Reverb amps come across the bench in one day. One was a museum quality 1965 that I was probably the first to turn a screw on. Original tubes, everything. Not a stain or scratch. I left that one alone. 

The second was a butchered 1973 model. Someone had done plenty of "wha????" stuff to it. I needed to restore the thing so I figured I'd see if I am crazy thinking this mod is as good as I think it is. 


Once I got the bugs sorted I blasted it and got that awful sound I usually get with the Princeton Reverb. Lovely at low volume, just awful to my ears at high volume. For me the 5e3 with it's simple volume and tone arrangement, that works for me. Not to mention the softer warmer cathode bias. With the Princeton's grid bias, scooped mids and more complex tone stack, it just never suited me. 

Spot the 3.3Meg resistor:


It's right on the .022 cap feeding the phase inverter. The Princeton and 5e3 Deluxe have a very similar phase inverter. 

Disclaimer: what you see above is not my work! It's sloppy but functional. This job was for a client who needed to keep the cost low. I would typically gut something like this and do it over!!!!

I've seen all kinds of complicated mods done to Princeton Reverbs. I've seen the tremolo scrapped so someone can re-do the whole phase inverter to be like a Deluxe Reverb. Ugh! The tremolo is the thing I like the most in a Princeton!! Try this one simple mod first if you want more headroom. 

That's it today. Hope you got something out of this article. Please feel free to leave questions and comments below!

And here's me yammering on about this stuff on Skips podcast. I think he's doing a great service to those who like to play with capacitors! Thanks Skip!


-J